
Adding resources to your Microsoft Project Schedule the right way can save you time in the long run by making these resources available via email for status and task updates, or for import into Microsoft Project server.
Here’s how to do it…
From the Task tab, select the View drop down box (which is typically defaulted to “Gantt Chart”):
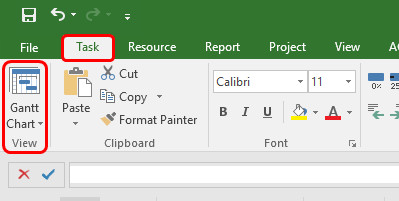
And select Resource Sheet:

Once on the Resource Sheet, select Add Resources:
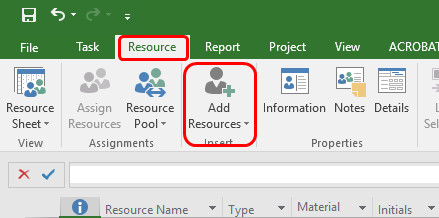
Then select Address Book:
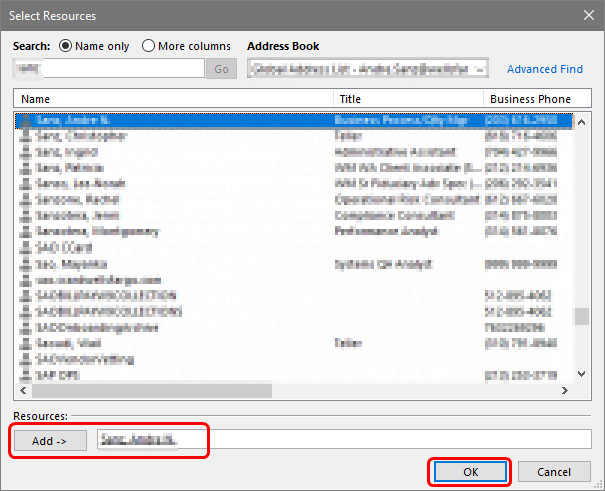
Select the names of those you’ll be adding to your project, clicking on the Add button each time. Select OK when done.
Once you’ve added all the necessary names, you can make final adjustments, including the updating of the base calendar used by the team or specific participants:
